I watched and read alot of pins before starting on this project, so it's a blend of sorts. Here we gooooo.........
YOU WILL NEED:
- 12 Gauge Wire
- Heavy Duty Aluminium Foil
- Wide Headband (2, holes optional but made it much easier to work with)
- Painters Tape or Masking Tape
- Electrical Tape
- Flowers
- Skeletons/Skulls
- Ribbon
- Paint, Colors Your Choice
- Newspaper (not pictured, and almost forgotten)
You will need some of these items more in part two, but here are the steps for how I began making my antlers!
STEP ONE:
Make a shape for the base of your antlers, freehand or with refrences,
STEP TWO:
Wrap the wire base in the foil. Some tutorials only used foil as the base, which is really crafter's choice. I wanted the wire for strength but also because I would be attaching the antlers to a headband.
STEP THREE:
Oooh got a little ahead with that last picture! Ok, so once you wrap the first base antler with foil, cut smaller pieces of your wire and attach them to your base. I then used the electrical tape to smooth it out for the future foil. Antlers, like eyebrows are sisters and not twins, so don't worry if they aren't super symetrical. Also leave about 2 inches of wire bare at the bottom for attaching purposes. Oh and, when you wrap the foil, make the bottom a bit wider to mimic real creature horns.
(Unlike me who did end up fussing with these too long before I recognized their unique ways.)
STEP FOUR:
Wrap the entire thing in masking or painters tape. It provides a more textured surface for the paper maiche and it smoothes out the foil bumps.
STEP FIVE:
Attach the antlers to your headband
The headband/wire combo really holds up. And at Halloween party time, that is clutch.
STEP SIX:
Prepare your paper maiche. One part Mod Podge and one part water. Use plastic dishware.
Cut newspaper strips.
Cover your work station :)
(I never did use the foam brush except to mix)
It's the same paper maiche technique you learned in school, dip your paper, squeeze off excess, adhere to surface. Continue until you have one full layer and let dry. You can wait a couple hours or do overnight like me only because I wait to be lazy the rest of this night haha.
While your antlers dry, begin on your floral head pieces. I am making two of them along with my antlers because obviously I love to make myself crazy/my Halloween character this year is Dramatic! :)
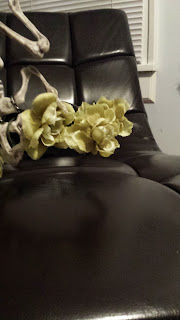
So here's my little frog skeleton head piece:
STEP ONE:
Find a headband that is big enough to fit on the front of your forehead. Once you have it, take your skeleton and wire this creature to the front middle.
I used electrical tape to cover the comb bits on the headband for pure comfort.
STEP TWO:
Put some flowers on it!
Lana Del Rey that skeleton. Make an outrageous crown for yourself. It's the best holiday for it!
STEP THREE:
Your antlers are pretty dry by now, so go ahead and put them on with your frog piece. See how they look together and decide "Is this enough or too much?" Spoiler, you can never be too much.
Tomorrow I shall be continuing on the antlers, so look for PART 2 soon :)
Keep on, keepin' on!
M.


No comments:
Post a Comment